How to Set Up Your Levitaz Free Series Hydrofoil Perfectly: The Ultimate Guide
The correct position of your foil on the board determines control, stability, and the perfect amount of lift. To save you hours of trial and error, we have summarized the most important dimensions, deck angles, and setup tips for you right here.
The Most Important Rule of Thumb for Foil Assembly
If you want to mount your hydrofoil quickly and easily, just remember this simple rule of thumb:
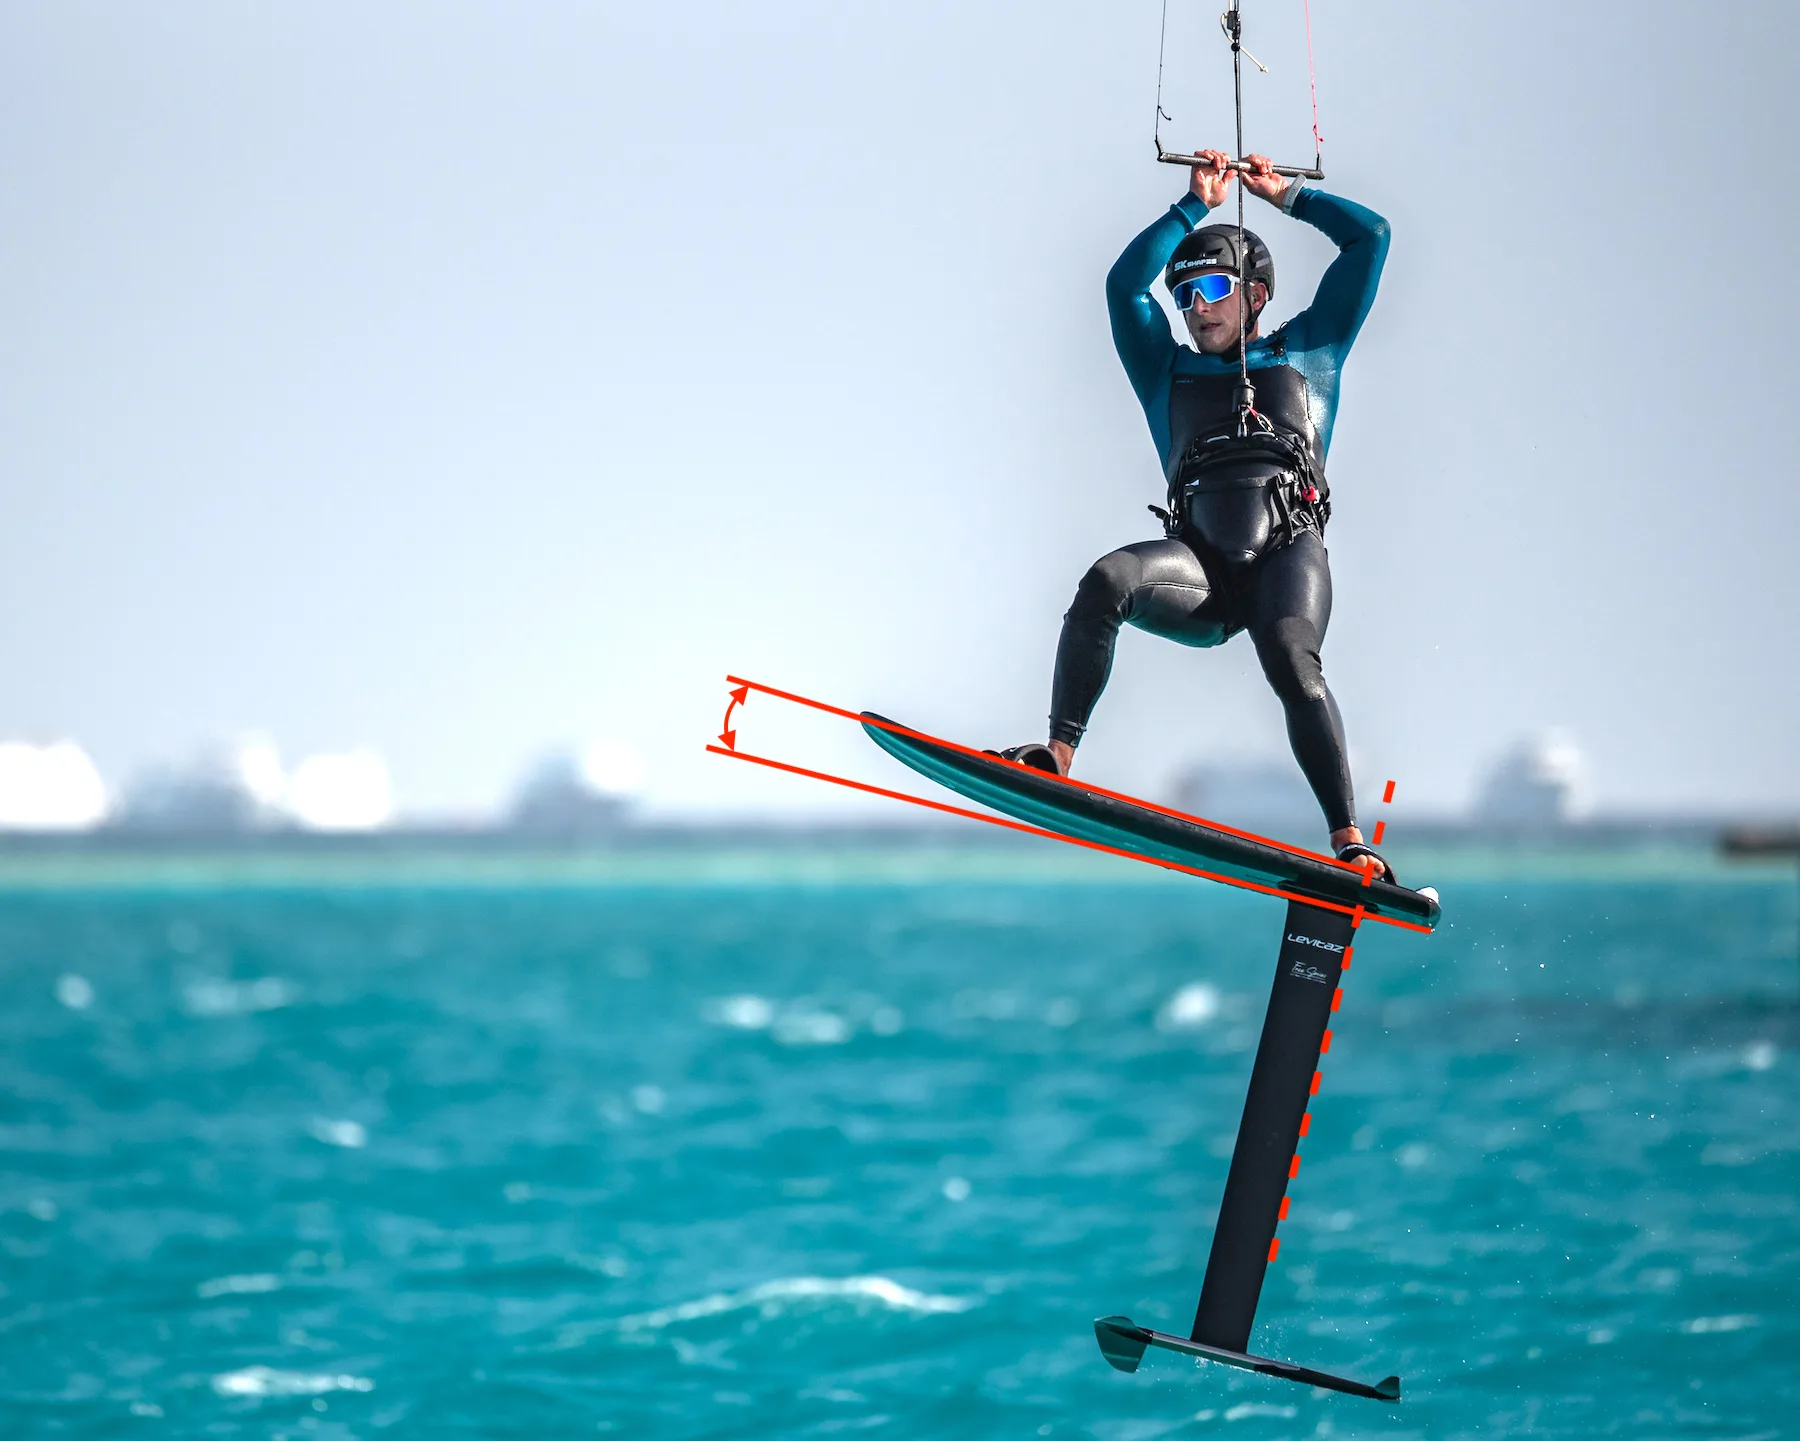
Rule of Thumb: The trailing edge of the mast aligns directly with the center of the back footstrap (see the dashed line in the graphic).
By using this reference point, you will instantly get an excellent baseline setup for balanced handling on the water.
The Dimensions in Detail (Step-by-Step)
To help you measure everything down to the exact centimeter, here are the precise target values from our diagram.
(Pro Reference: In parentheses, you will find the personal setup of Stan Keusch, founder and owner of SK Shapes – 68 kg, 170 cm height, riding style: Freeride/Freerace & Big Air).
1. Strap Spacing & Width (Dimensions A & B)
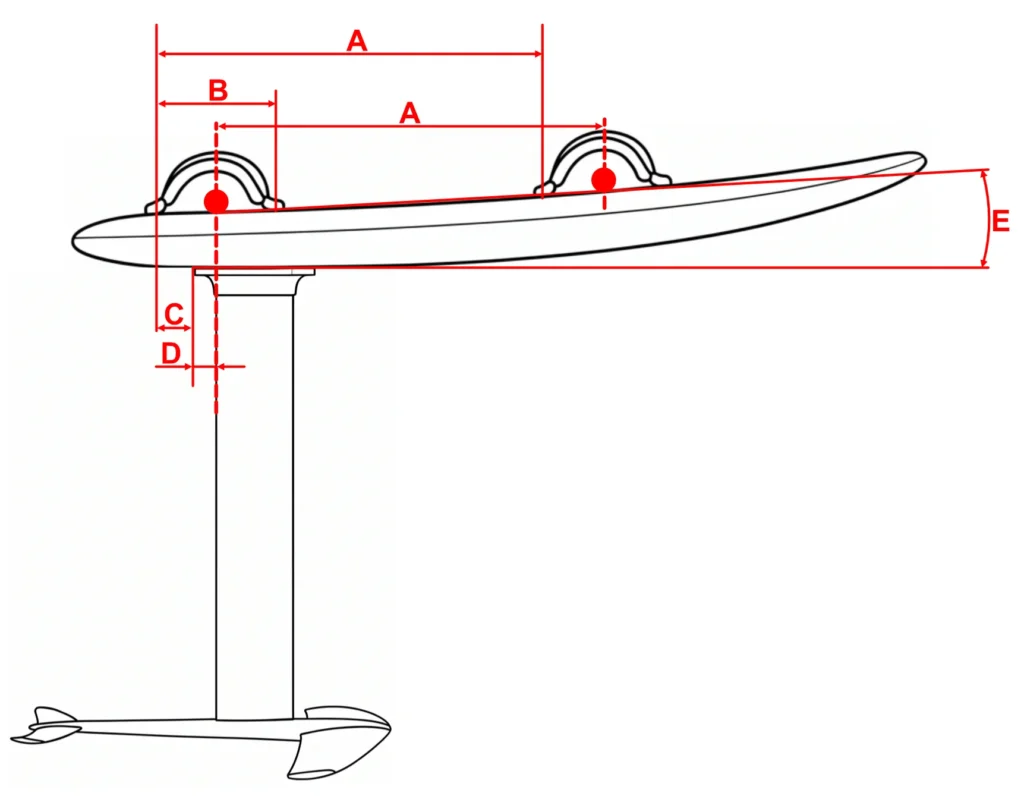
- A – Stance / Distance between front and rear strap (center to center):
• Recommendation: 70 – 75 cm (My setup: 72 cm)
• Tip: This stance width ensures a stable stance and maximum control at higher speeds and during jumps. - B – Footstrap width (rear strap):
• Recommendation: 14 – 17 cm (My setup: 15.5 cm)
• Tip: A properly adjusted strap width gives you a firm grip during Big Air jumps and freeracing while preventing your foot from getting stuck during a crash.
2. Foil Positioning on the Track System (Dimensions C & D)
- C – Distance from the rear screw of the back strap to the end of the mast plate:
• Recommendation: 3 – 5 cm (My setup: 4 cm) - D – Distance from the end of the mast plate to the trailing edge of the mast:
• Fixed measurement (cannot be adjusted): 4.5 cm (Measured from the end of the mast plate to the trailing edge of the mast profile)
3. Board Angle of Attack / Deck Angle (Dimension E)
- E – Angle of inclination between the board and the mast:
• Recommendation: 2.5° – 3.0° (My setup: 2.8°)
• Tip: This angle ensures that the board skims smoothly across the surface during touchdowns instead of catching an edge. Additionally, these measurements ensure that the pressure between your front and back foot is balanced.
Important Note on Dimension E: This dimension can only be adjusted to a limited extent using shims. If your foil is mounted as recommended above but still feels off, the issue might be this angle. Dimension E also serves as an essential reference value for board shapers if you are having a custom hydrofoil board built.
Summary: Quick Assembly Guide
- Set your rear footstrap to a width of approx. 15.5 cm.
- Mount your front footstrap at a distance of approx. 72 cm (center to center).
- Slide the mast in the track so that the rear end of the mast plate is approx. 4 cm away from the rear screw of the back strap.
- Tighten the screws and head out onto the water!
Bonus Fine-Tuning Tip:
-
Rider Weight Adjustments: If you weigh more than 80 kg, slide the mast 1 cm further forward than the reference setup for more lift. If you weigh below 60 kg, slide the mast 1 cm further back.
-
Front Wing Adjustments: These base measurements are ideal for the Free Series 680 Front Wing. If you are using the 540 Front Wing, try moving the mast 1 cm forward. If you are using the 790 or 900 Front Wing, slide the mast 1 cm back.
-
Conditions Adjustments: If you prefer more front-foot pressure (e.g., for extra control in high winds or at top speeds), slide the foil 1–2 cm further back. If you need more lift in light wind, slide it 1–2 cm further forward.